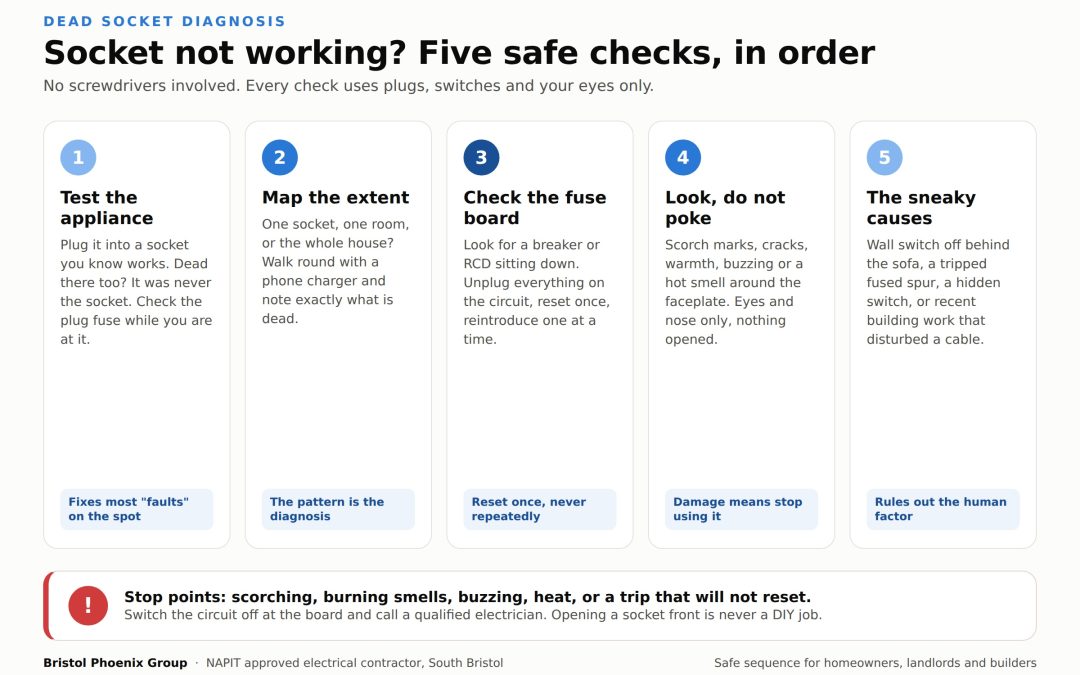
A socket not working is one of those faults that announces itself at the worst possible moment: the kettle goes cold, the lamp dies mid-chapter, or the phone charger sits there doing nothing while the battery ticks down. Before you assume the worst, or worse, reach for a screwdriver, it pays to work through a few safe checks in the right order. Most dead sockets turn out to have a boring explanation. A few are an early warning of something that needs proper attention. We are Bristol Phoenix Group, a NAPIT approved electrical contractor based in South Bristol, and this is the exact sequence we would ask you to try before we ever pick up our test gear.
Table of Contents
- Two safety rules before you touch anything
- Socket not working? Run the checks in this order
- What the pattern tells you
- A worked example from a typical Bristol terrace
- Why sockets stop working in the first place
- The stop points: where DIY ends
- What it costs to put right
- When one dead socket points at a bigger problem
- Socket still not working? Talk to us
TL;DR
- Test the appliance in a different socket first. A dead kettle in a healthy socket wastes more electrician call-outs than any other fault we see.
- Check whether it is one socket, one room, or the whole house, then look at the consumer unit for a tripped switch before anything else.
- Never open a socket or fuse board yourself. Resetting a trip switch and flicking a fused spur are the limit of safe DIY.
- Scorch marks, burning smells, buzzing or a warm socket front mean stop using the circuit and get help the same way you would for any fault that should not wait.
- Straightforward fault finding typically costs £50 to £200 at standard UK rates, and a like-for-like socket replacement is usually £25 to £80.
Two Safety Rules Before You Touch Anything
Rule one: nothing in this guide involves a screwdriver. Every check below is done with plugs, switches and your eyes. The moment a job means removing a socket front or opening the consumer unit, it stops being a DIY job. That is not us protecting our trade. Mains voltage does not offer second chances, and the wiring behind a socket front does not care how confident you feel.
Rule two: if anything smells hot, looks scorched, buzzes, crackles or feels warm to the touch, do not keep testing it. Switch the circuit off at the consumer unit, leave it off, and get a professional in. According to the Institution of Engineering and Technology, there are around 19,300 accidental domestic fires linked to electricity each year, about 53% of all accidental house fires in England. A socket that is cooking itself quietly behind the faceplate is exactly how some of those start.
With those two rules in place, here is the order that finds the cause fastest.
Socket Not Working? Run the Checks in This Order
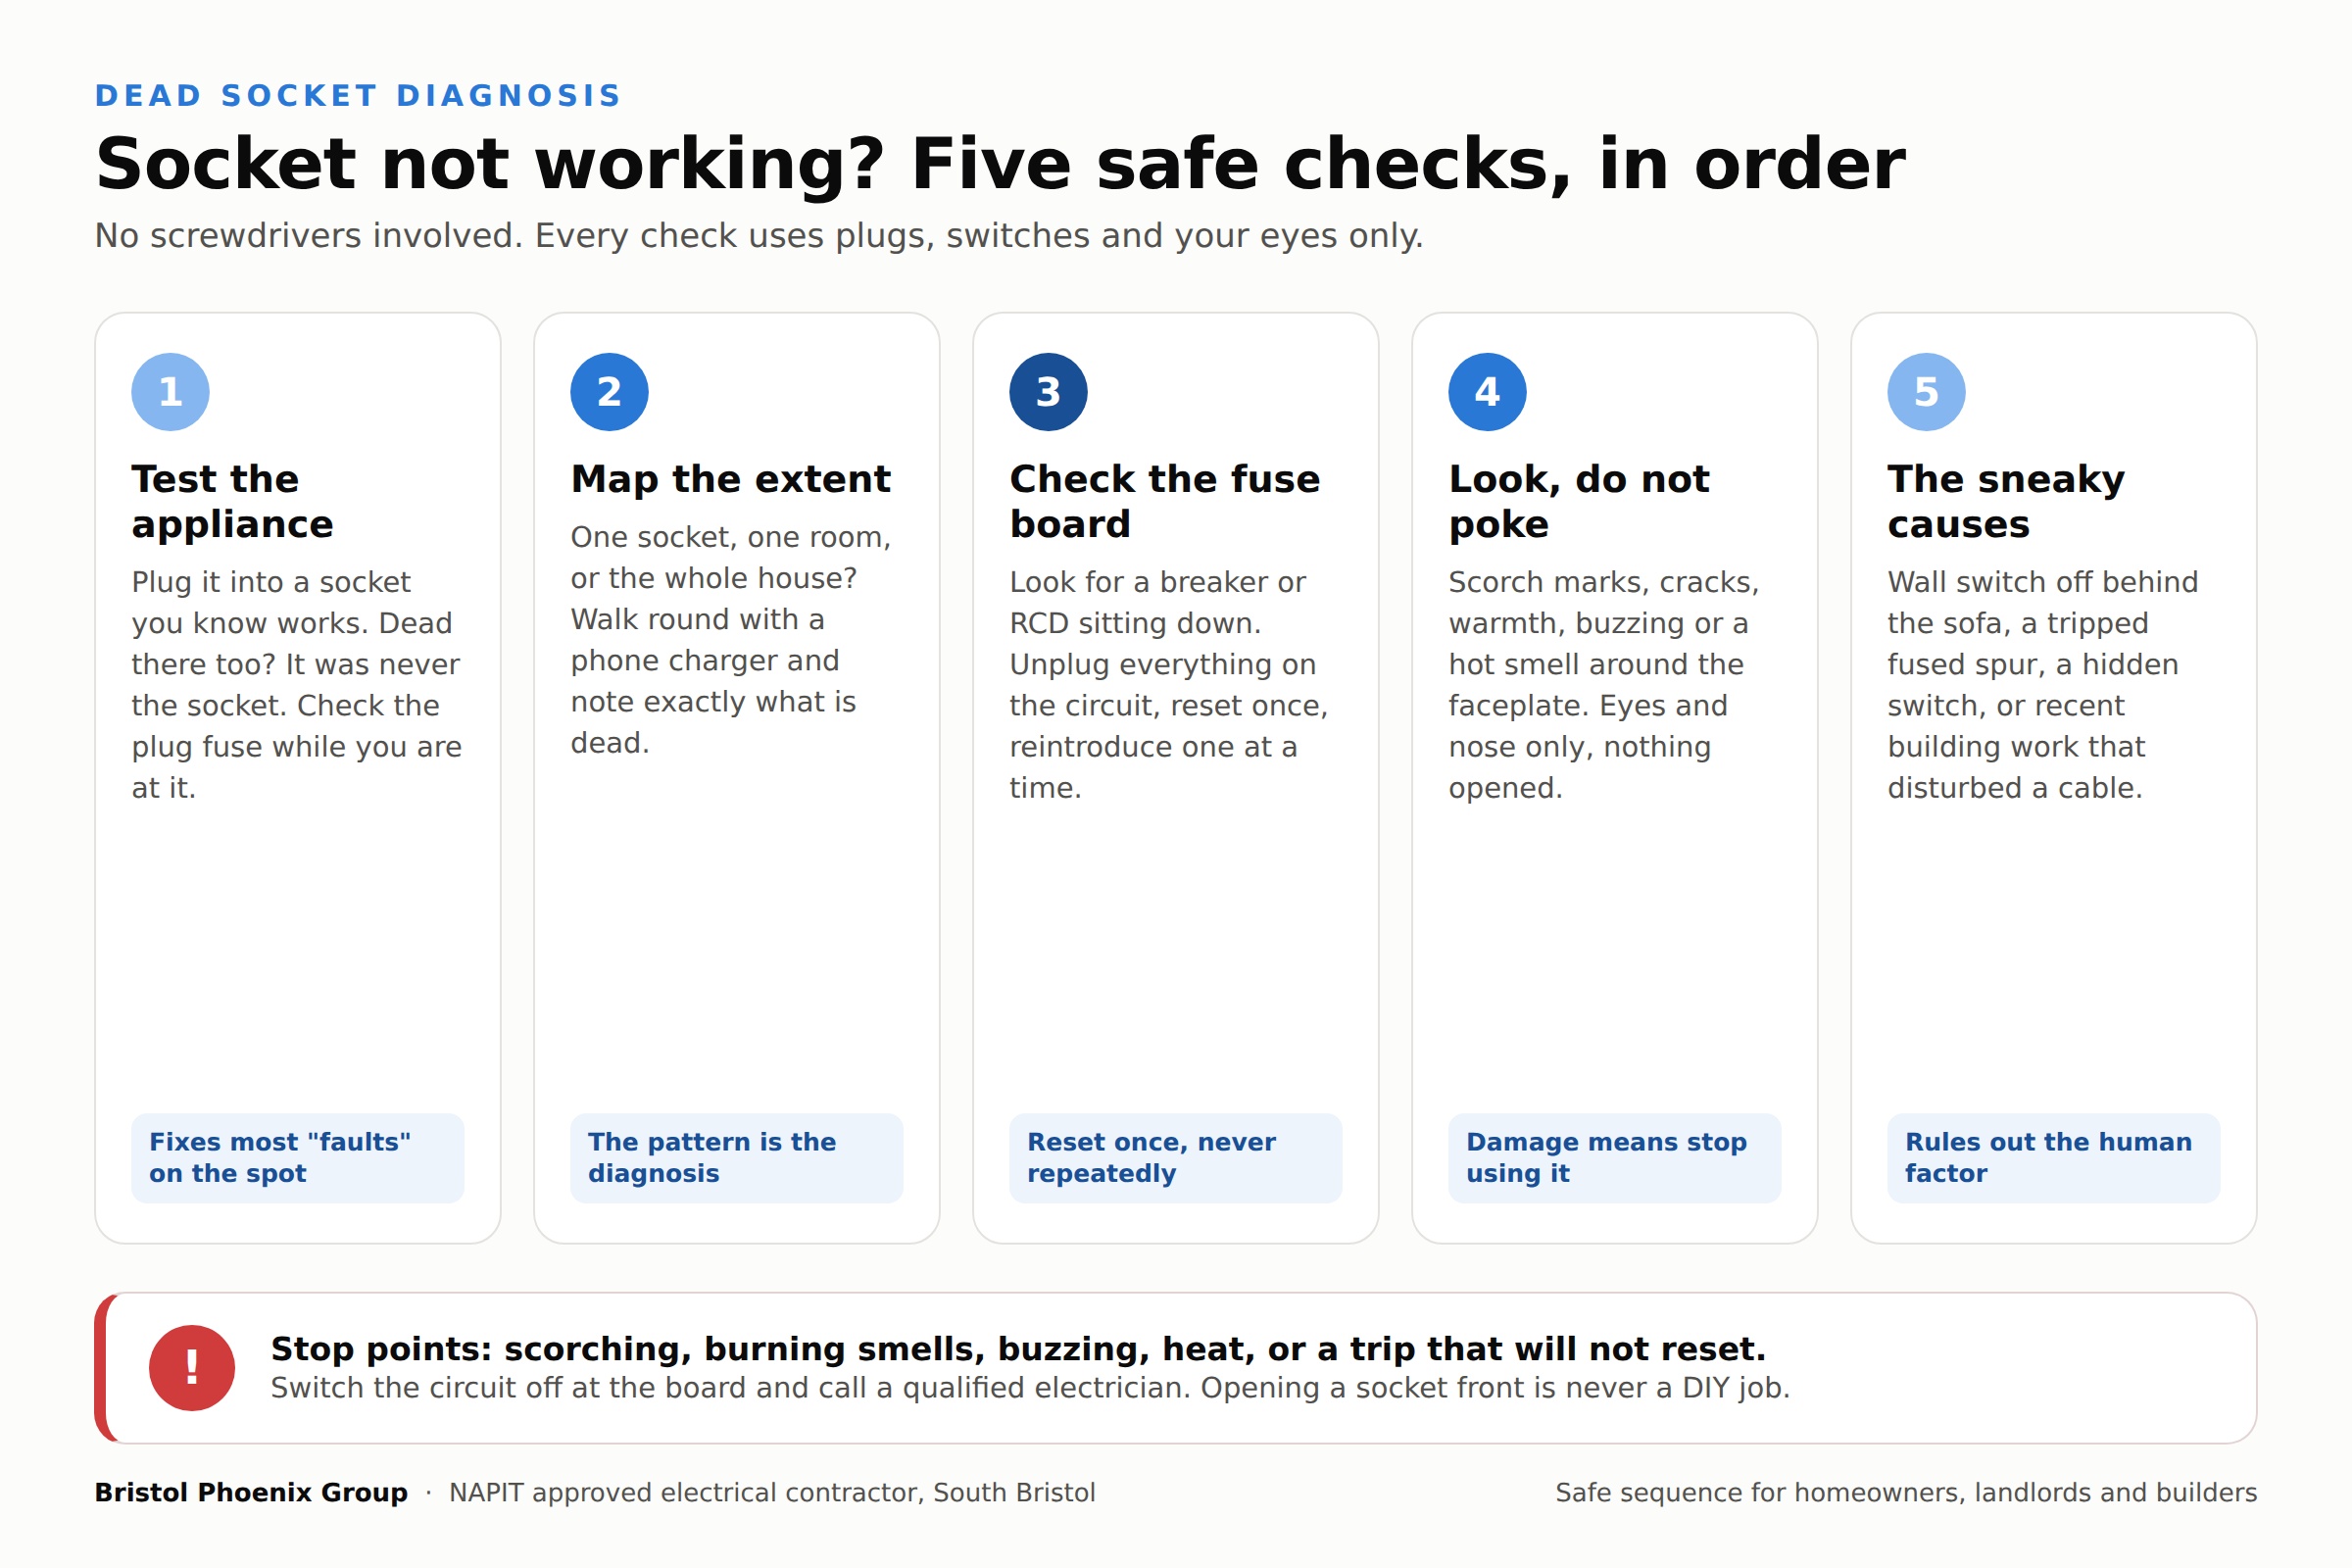
The sequence matters. Each step rules out the most likely and least serious explanation before you move to the next, so you stop as early as possible and you hand any electrician a much better description of the fault if it comes to that.
Step 1: Is It the Appliance or the Socket?
Take the appliance that is not working and plug it into a socket you know is fine, ideally in another room. If it is still dead, you have an appliance problem, not a socket problem, and you can put the fuse board out of your mind. Try a second appliance in the suspect socket to confirm it the other way round: if a lamp or phone charger works happily in the socket that supposedly failed, the socket was never the problem.
While you are at it, check the plug. A blown fuse in the plug top is a classic, and swapping it for one of the same rating is reasonable DIY. If the new fuse blows immediately, the appliance is telling you something, and the answer is not a bigger fuse.
Step 2: Socket Not Working but Others Are? Map the Extent
Now work out how big the problem actually is. Is it one socket, every socket in one room, or every socket in the house? Walk round with a phone charger and test methodically. The answer changes the diagnosis completely.
One dead socket with its neighbours working usually means a fault at that socket: a loose connection behind the faceplate, worn contacts that no longer grip the pins, or a break in the cable serving that point. A whole room or a whole floor gone quiet points at the circuit. Everything off everywhere points at the main switch, the supply, or a tripped device taking the lot out. If you find a plug socket stopped working alongside dead lights, note that too, because sockets and lighting normally run on separate circuits, and both going together tells an electrician a lot.
Write down or photograph what you find. It sounds fussy, but “the double socket left of the chimney breast is dead, the single under the window works” is exactly the information that shortens the paid part of the diagnosis.
Step 3: Check the Consumer Unit
Go to your consumer unit, the fuse board, usually in the hallway, under the stairs or in the garage. Look for a switch sitting down or out of line with its neighbours. Modern boards have MCBs, the small circuit breakers, plus one or more RCDs, the wider safety switches that protect groups of circuits. Any of them can have tripped.
If a breaker has tripped, unplug everything on that circuit that you can identify, then reset the switch firmly. If it holds, plug things back in one at a time until you find the culprit, which is very often a single faulty appliance. We have covered the patterns in detail in our guides to a fuse box that keeps tripping and an RCD that keeps tripping, including what it means when a switch refuses to stay on.
Two things to know here. First, resetting a trip once is fine; resetting it repeatedly against a fault is not, because the device is doing its job and you are overruling it. Second, if the board is an older type with rewirable fuses rather than switches, leave the fuse carriers alone. Boards of that age deserve professional eyes anyway.
Step 4: Look, Do Not Poke: the Visual Check
With the easy explanations ruled out, give the socket itself a proper look, without opening anything. You are looking for brown or black scorch marks around the pin holes, a cracked or chipped faceplate, a faceplate sitting proud of the wall, any smell of hot plastic, buzzing or crackling when something is plugged in, or a socket front that feels warm when nothing is running. Any one of those means stop using the socket, switch off the circuit at the board if you can identify it, and treat it as a fault that should not wait. The IET’s April 2026 research found 10.9% of people carry on using damaged sockets and 14.6% admit to taping over frayed or damaged wires. Please do not be either of those statistics.
Step 5: The Sneaky Causes Nobody Thinks Of
Before you conclude the socket is dead, check for the quiet, human explanations. Is the socket switched off at the wall? Obvious, but it catches everyone eventually, usually behind a sofa. Is the socket fed through a fused connection unit, a small switched plate nearby with its own fuse, common for kitchen appliances and boilers? That fuse can blow, and the switch can get knocked. Is the socket on a run controlled by a wall switch, which turns up in older properties and bedrooms wired for bedside lamps? And is there any chance builders, plasterers or a new kitchen fit disturbed the wiring recently? A socket that dies within weeks of trade work in the house is rarely a coincidence.
What the Pattern Tells You
Here is the shorthand we use when someone rings us and describes a dead socket. It is not a substitute for testing, but it sets expectations about what the fix is likely to involve.
| What you found | Most likely cause | Sensible next step |
|---|---|---|
| Appliance dead in every socket | Faulty appliance or blown plug fuse | Replace the plug fuse like for like, or retire the appliance |
| One socket dead, others fine | Loose connection or worn socket | Electrician to test and replace the socket or remake the joint |
| Whole room or floor dead | Tripped breaker or a break in the circuit | Check the consumer unit; if resetting fails, book fault finding |
| Sockets trip the board when used | Faulty appliance or damaged wiring | Unplug everything, reset, reintroduce one at a time |
| Scorching, buzzing, heat or burning smell | Failing connection arcing behind the plate | Stop using it, switch the circuit off, call a professional |
| Dead sockets after building work | Nail, screw or drill through a cable | Do not reset repeatedly; book fault finding and say what was done |
A Worked Example from a Typical Bristol Terrace
Picture a typical Victorian terrace in Totterdown or Bedminster, the kind South Bristol is full of. The owner finds the two sockets in the front bedroom dead. Lights work, the rest of the house works, nothing has tripped at the board. On the sequence above: the phone charger proves it is not the appliance, the walk-round shows exactly two dead sockets, the consumer unit shows every switch up, and the visual check shows nothing alarming.
That pattern, a small cluster of dead sockets with a healthy board, very often turns out to be a connection that has worked loose at one socket, cutting off everything wired onwards from it. Terraces of this age have usually been extended, part-rewired and “improved” by several generations of owners, so one bedroom is sometimes fed as a spur from a single point, and one loose terminal takes out the lot. It is a tidy hour of testing for an electrician with the right instruments, and frequently a small repair at one back box. The homeowner’s notes cut the diagnosis time roughly in half, because the electrician walks in already knowing which two points to start from. That is the whole argument for running the checks in order, even when the eventual fix is professional.
Why Sockets Stop Working in the First Place
Sockets have no moving parts beyond the switch, so when one dies there is always a reason. Loose terminations are the most common: conductors expand and contract with every heating cycle, and over years a screw terminal can slacken until the connection starts to arc and overheat. Worn contacts come next, especially in kitchens where the same plug goes in and out daily for a decade. The brass loses its grip on the pins, the connection gets resistive, and the socket cooks itself gently until it gives up.
Then there is the wiring behind the wall. Cables damaged by picture hooks, shelf fixings and floorboard nails can take months to fail fully. Rodents chew insulation in lofts and voids. And in older Bristol housing stock, some of it still carrying wiring from the 1960s and 1970s, age alone does the damage: rubber and early PVC insulation gets brittle, and joints made 50 years ago finally let go. If your house still has the old red and black conductors, our guide to old UK wiring colours explains how to read the clues about your installation’s age.
Moisture deserves a mention too, because this is Bristol and it rains. Outdoor sockets, garage circuits and sockets on damp external walls fail more often, and damp getting into a junction is a classic cause of a circuit that trips in wet weather and behaves in dry.
The Stop Points: Where DIY Ends
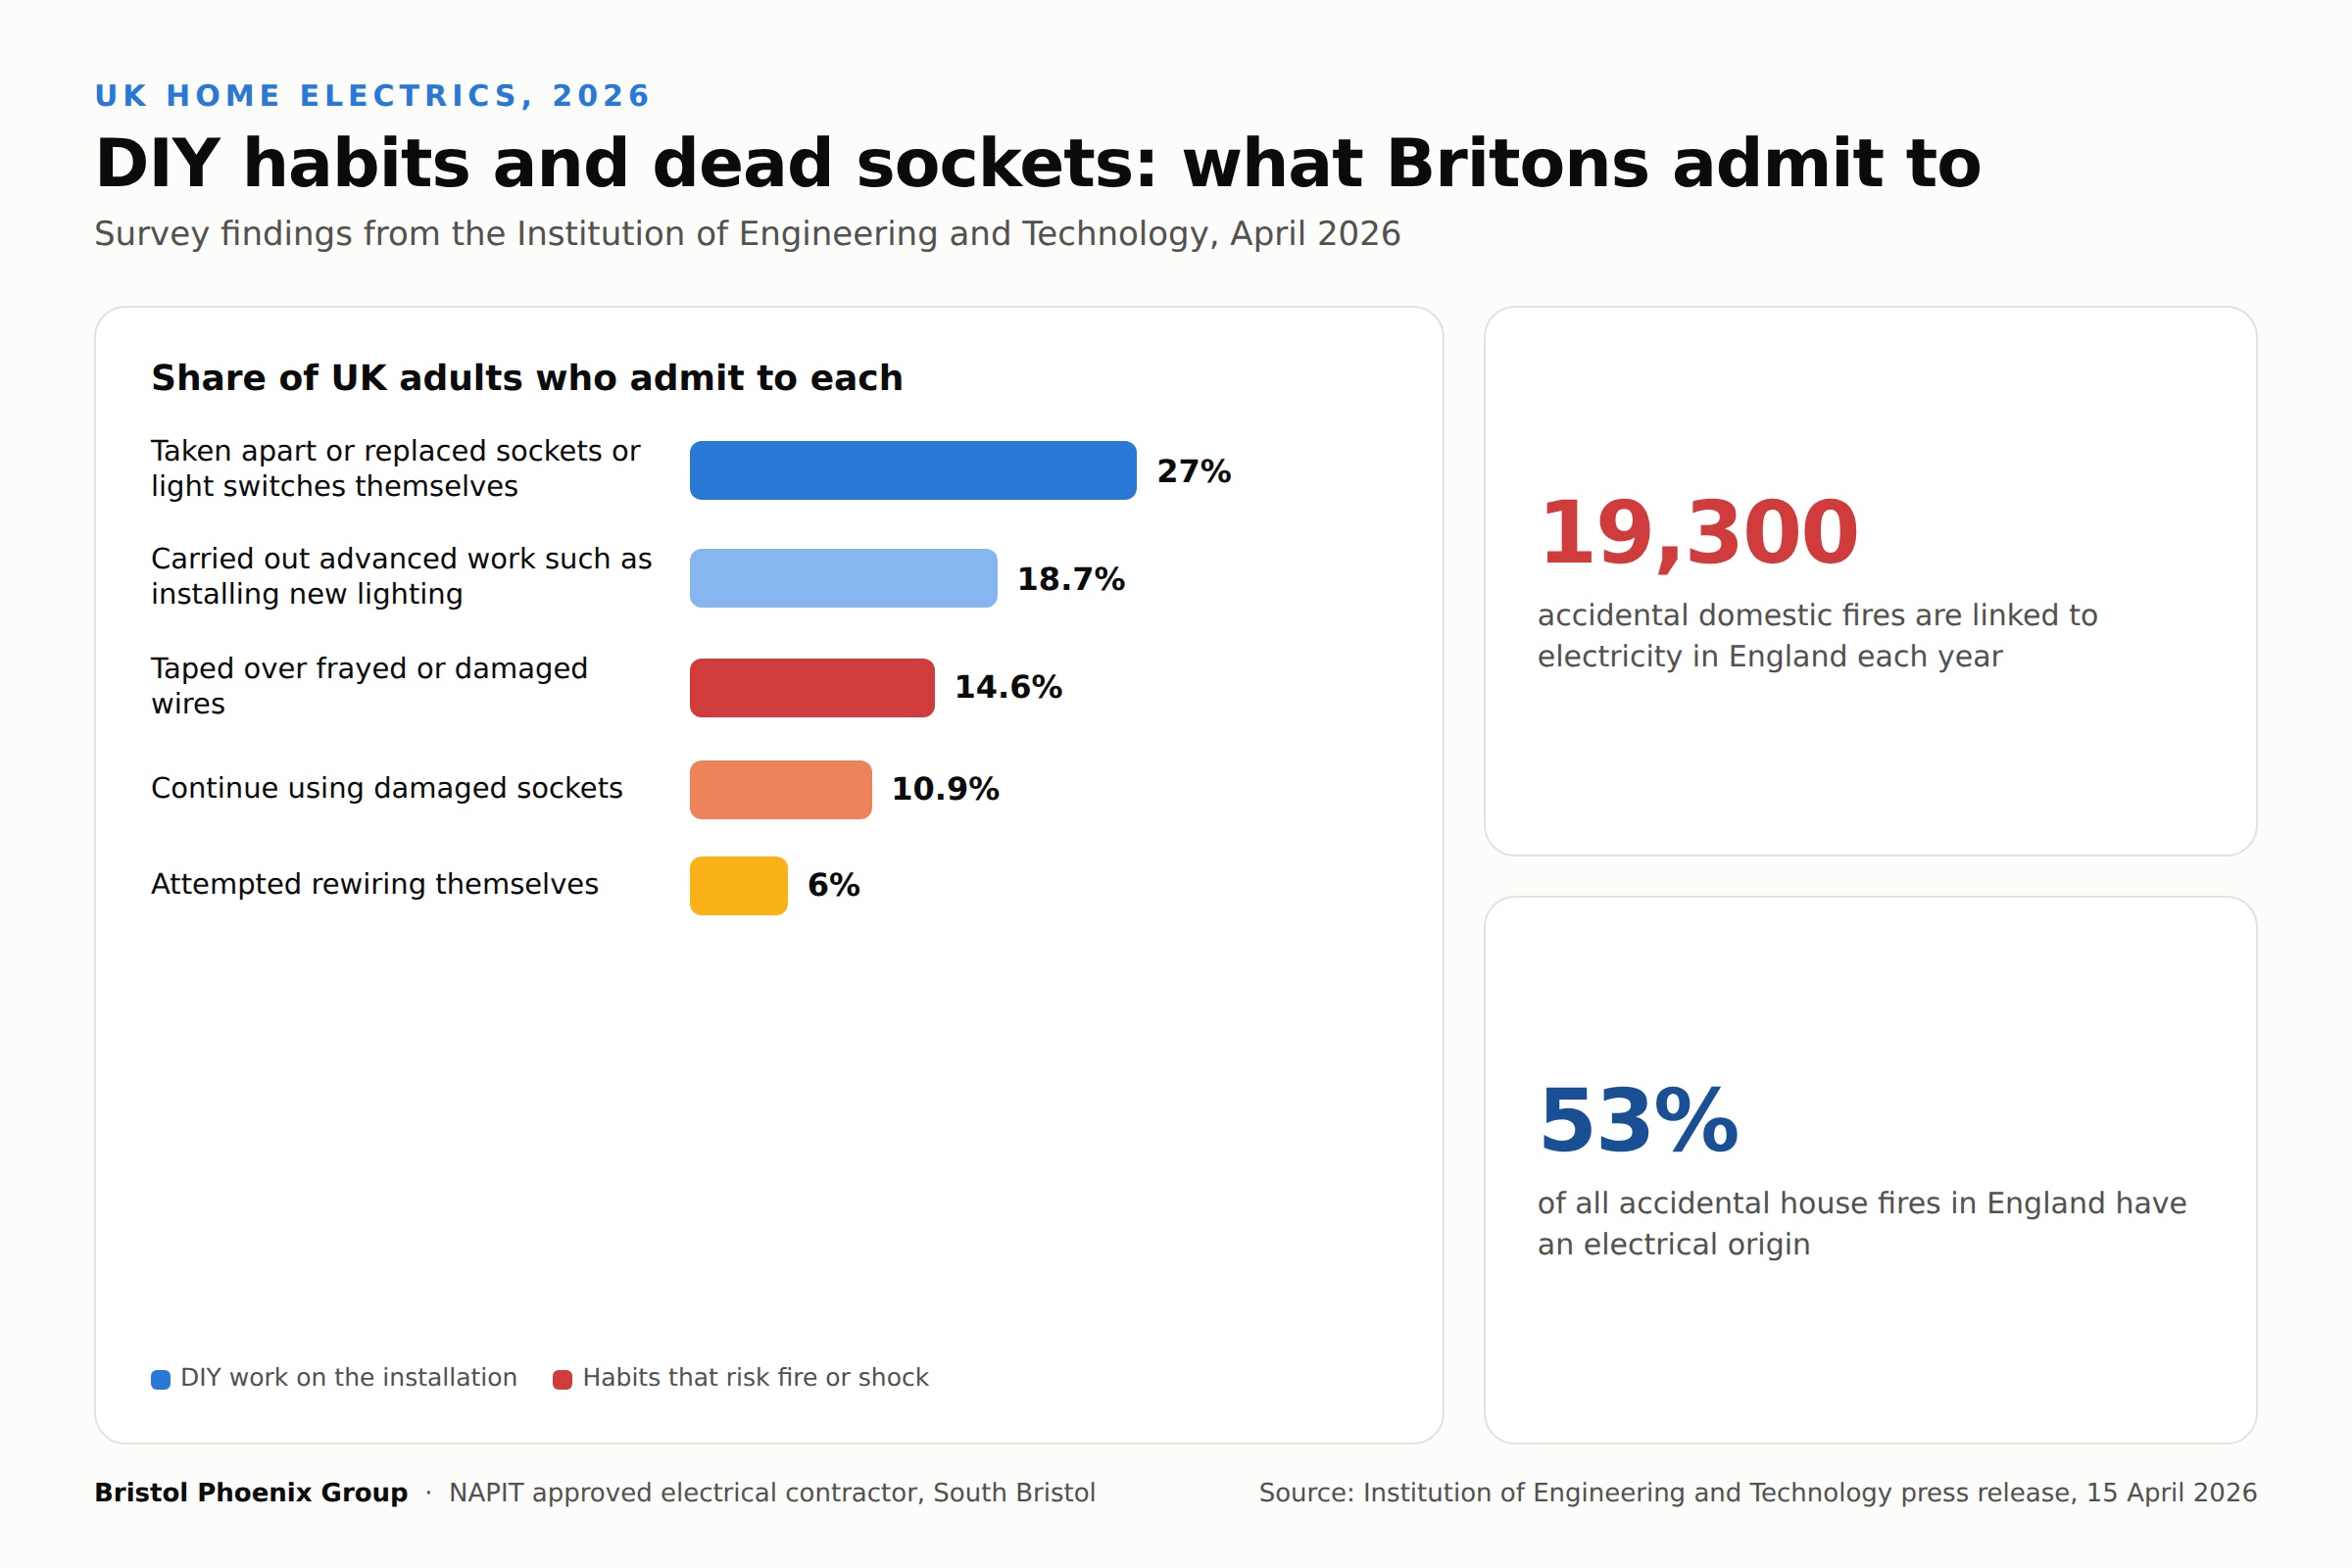
The IET’s research found that 27% of UK adults have taken apart or replaced fittings such as plug sockets or light switches themselves, and 6% have attempted rewiring. We understand the temptation, but the honest professional position is that the safe DIY list for a socket fault is short: testing appliances in other sockets, replacing a plug-top fuse like for like, resetting a tripped switch once, flicking a fused spur back on, and looking carefully at what you can see. Everything else is a job for someone with test instruments, and here is why.
A socket can be dead and still dangerous. A broken neutral or a fault elsewhere on the circuit can leave parts of the wiring live even though nothing works, and no multimeter from a DIY shed, used on live equipment by someone learning as they go, is a safe substitute for proper dead testing and safe isolation procedure. There is also the paperwork angle: in England, electrical work in dwellings falls under Building Regulations, and while a like-for-like accessory swap is minor work, anything beyond it can be notifiable. Our plain-English guide to Part P of the Building Regulations covers what that means when you sell or let the property.
The stop points, plainly: any scorching, smell, buzzing or heat; any trip that will not reset or re-trips immediately; any fault following building work; any socket fault in a property with an ageing fuse board or old wiring colours; and any job that would involve removing a faceplate. Hit any of those and the next step is professional electrical fault finding, not a YouTube tutorial.
What It Costs to Put Right
The good news is that socket faults sit at the affordable end of electrical work. Current UK price guides from Checkatrade and MyBuilder put standard electrician rates at roughly £45 to £60 an hour, with straightforward domestic fault finding typically landing between £50 and £200 and a socket replacement between £25 and £80 depending on the fitting and access. Those are national ranges, and the usual caveats apply: minimum call-out charges exist, and a fault that hides well costs more to find than one that shows itself quickly.
For clarity on how we handle it ourselves: our fault finding attendance in Bristol is a fixed £168 including VAT for up to around an hour on site, which covers safe isolation, diagnosis and the fix there and then where possible, with any bigger repair priced in writing before we carry on. No hourly meter quietly running, and no surprise at the end.
| Job | Typical UK range | Notes |
|---|---|---|
| Electrician standard rate | £45 to £60 per hour | Regional variation; minimum charges common |
| Domestic fault finding | £50 to £200 | Depends on how quickly the fault shows itself |
| Replace a damaged socket | £25 to £80 | Like for like, easy access assumed |
| Add a brand new socket | £55 to £75 per socket | More where walls need chasing or circuits extending |
One habit worth adopting: fix the small fault while it is small. A £75 socket replacement this month is better value than the repair that follows a socket left arcing behind a wardrobe for a year.
When One Dead Socket Points at a Bigger Problem
Most of the time a dead socket is a local fault with a local fix. Sometimes it is the first symptom the installation shows you. If dead or intermittent sockets keep appearing in different rooms, if trips are becoming a routine event, if sockets sit loose in crumbling back boxes, or if your wiring predates the modern colours, the sensible move is to zoom out from the one socket and look at the installation as a whole. Our guide to the signs your house needs rewiring walks through what genuinely indicates age-related decline rather than a one-off fault.
The IET’s same 2026 study found that while 79% of UK adults feel confident their home is electrically safe, fewer than a third have had their electrics checked by a qualified electrician within the past decade. A recurring socket fault is as good a prompt as any to close that gap with a proper inspection rather than a rolling series of small repairs.
Socket Still Not Working? Talk to Us
If you have run the checks above and the socket is still dead, the fault has earned professional attention. We are a NAPIT approved contractor based in South Bristol, we cover the city and the surrounding South West, and dead sockets are bread-and-butter work for us: we test circuit by circuit with proper diagnostic equipment, explain what we find in plain English, and agree any repair and its price in writing before touching anything. For faults in the category that should not wait, burning smells, scorching or a board that will not hold, our urgent electrical faults page explains exactly how we handle those calls and what to do while you wait.
Either way, start with a conversation. Tell us what you found at each step, send a photo of the socket and your fuse board, and we will tell you honestly whether it needs us at all. You can reach us through our contact page or on 0117 2447 382.